
[ad_1]

If you wish to seize flattering portraits, then you will need to grasp lighting. Happily, that is fairly straightforward, because of lighting patterns – that’s, easy portrait lighting setups you may constantly use for nice-looking photographs.
In actual fact, portrait lighting patterns are nice for newbies and superior shooters alike; as an skilled portrait photographer, I exploit these patterns on a regular basis in my very own work.
Under, I share six helpful pictures lighting strategies that each portrait artist ought to know. I additionally embody lighting diagrams, so you realize precisely easy methods to replicate the sample in your individual studio.
Are you able to take your portrait photographs to the subsequent degree? Let’s get began.
1. Break up lighting
Break up lighting appears the best way it sounds; it splits the face into equal halves, like this:
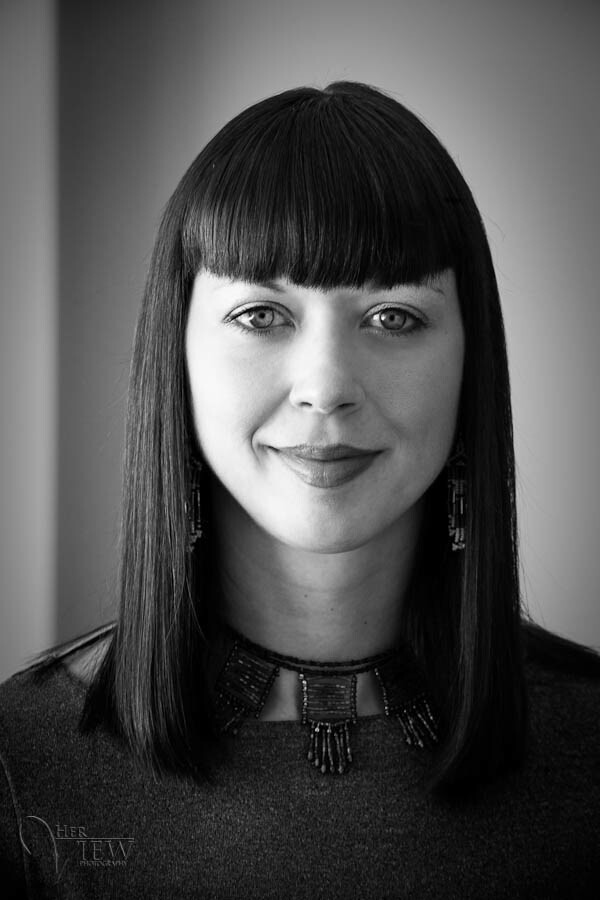
As a result of this half-shadow impact is fairly dramatic, particularly when the sunshine is difficult, it’s typically used to create moody photographs of musicians and artists.
To attain cut up lighting, merely put the sunshine supply 90 levels to the left or proper of the topic (you may even transfer it barely behind their head). In true cut up lighting, the one a part of the “shadowed” face that needs to be lit is the attention (as proven within the photograph above). Right here is the easy cut up lighting diagram, although observe that you may all the time spruce up a split-lit picture with fill lights, rim lights, and background lights:

Additionally, be sure that at the very least one among your topic’s eyes accommodates a catchlight (a shiny spot of sunshine that displays from the sunshine supply). In any other case, the eyes will seem lifeless, and your complete shot will possible be ruined.
2. Loop lighting
Loop lighting positions a small shadow from the topic’s nostril throughout their cheek. Take a look at the photograph under; see how the nostril shadow falls barely to the appropriate of the nostril?

Loop lighting might be the commonest lighting sample you’ll encounter in portrait pictures. Why? It’s straightforward to create, plus it flatters most individuals! That’s why some photographers take into account it the very best lighting for portraits (particularly if you happen to’re a newbie).
Notice that, in loop lighting, the shadow of the nostril and the shadow on the cheek don’t contact. That’s a unique lighting sample, as I talk about within the subsequent part. As an alternative, maintain the shadow small and pointing barely downward (although don’t put the sunshine supply too excessive; in any other case, you’ll create odd shadows and lose the important catchlights). Right here’s one other instance, with a smooth shadow falling to the appropriate of the viewer:

To create loop lighting, place the sunshine supply barely above eye degree and about 30-45 levels from the digicam. The precise angle relies on the particular person’s face, so be at liberty to show in your modeling lamp (in case your gentle has one) or take a number of photographs with the strobe positioned in other places. Over time, you’ll get higher at studying individuals’s faces, and also you’ll have the ability to establish the proper loop-light place from the get-go.
The diagram under fashions the lighting situations for the couple picture I’ve shared above:

Notice that the black backdrop represents the financial institution of bushes behind the topics. The solar is coming over the bushes, and I’ve positioned a white reflector at digicam left to bounce gentle again into the topics’ faces. In a regular studio setup, you’ll place a strobe as an alternative of the reflector, although on this scenario – with the pure gentle from the solar – a reflector works simply positive!
And bear in mind: Your gentle needs to be barely above the topic’s eye degree. Inexperienced persons mess this one up quite a bit by placing the sunshine down low and angled upward. That lights the underside of your topic’s nostril, and the outcome isn’t so flattering.
3. Rembrandt lighting
Rembrandt lighting will get its title from the Seventeenth-century artist Rembrandt, who used it in his painted portraits. It’s recognized by a transparent triangle of sunshine on the topic’s cheek, like this:

Notice that the shadow of the nostril and the cheek do meet, which creates that little triangle; that is completely different from loop lighting, the place the shadows shouldn’t contact. Additionally observe that Rembrandt lighting is extra dramatic than loop lighting, so use it for moodier portrait periods and never for traditional household photoshoots.
To create Rembrandt lighting, place the sunshine off to the topic’s facet, and ask your topic to show barely away from the sunshine. The sunshine needs to be above their head in order that the nostril shadow falls down towards the cheek. Right here’s a Rembrandt lighting diagram, with a window as an alternative of a strobe (although you may, in fact, use any kind of sunshine supply):

Not each particular person’s face is right for creating Rembrandt lighting. If they’ve excessive or outstanding cheek bones, it’ll in all probability work – but when they’ve a small nostril or flat nostril bridge, it might be tough to realize.
Remember that you don’t all the time have to create this sample precisely; so long as your topic is flattered and also you get the temper you’re after, then the sunshine is working.
4. Butterfly lighting
Butterfly lighting is called for the butterfly-shaped shadow that’s created beneath the nostril, like this:

The result’s a really glamorous photograph, with shadows beneath the cheeks and chin, so that you’ll typically discover it in vogue magazines and photographs of film stars. It’s also flattering for older topics because it deemphasizes wrinkles, in addition to slim-faced topics (whereas topics with spherical, huge faces look higher with loop lighting or cut up lighting).
Butterfly lighting is tremendous easy to create. Simply place the sunshine supply immediately behind the digicam and barely above eye or head degree of the topic:

If the shadow beneath the nostril is just too sturdy, you may place a reflector immediately beneath the chin (your topic can maintain it, if want be).
This sample is hard to create utilizing solely window gentle or a reflector. You’ll typically want a tough gentle supply – such because the solar or a flash – to supply the extra outlined shadow beneath the nostril.
5. Broad lighting
Technically, broad lighting isn’t a portrait lighting sample; it’s a portrait lighting model, which you need to use with loop lighting, Rembrandt lighting, or cut up lighting. Nonetheless, it’s a helpful lighting setup that’s typically grouped with the patterns mentioned above, and I undoubtedly advocate you grasp it.
You get broad lighting when the topic’s face is barely turned away from the digicam, and the facet of the face turned towards the digicam is illuminated by the sunshine, like this:

Any such lighting makes an individual’s face look broader or wider (therefore the broad lighting moniker) and works properly when photographing topics with very slim faces. However most individuals need to look slimmer, not wider, so one of these lighting wouldn’t be applicable for somebody who’s heavier or spherical confronted.
To create broad lighting, flip the face away from the sunshine supply, as proven within the diagram under. Discover how the facet of the face nearer to the digicam receives gentle, whereas the far facet of the face stays in shadow.

6. Quick lighting
Quick lighting is the other of broad lighting; the facet of the face turned towards the digicam is shrouded in shadow, whereas the facet of the face turned away from the digicam is brightened.

It’s a helpful lighting sample for darker, moodier, and even low-key portraits. Notice that brief lighting places extra of the face in shadow, is extra sculpting, provides 3D qualities, and could be very slimming and flattering for most individuals.
To create brief lighting, ask your topic to show barely towards the sunshine supply, in order that the shadows fall on the facet of the face nearer to the digicam:

Portrait lighting setups: placing all of it collectively
As soon as you may shortly create every of the completely different lighting patterns, you can begin to study when to use them in your portrait periods. You’ll finally have the ability to decide the perfect portrait lighting just by finding out your topic’s face. And also you’ll study, over time, how completely different lighting patterns change the temper of the ultimate shot.
Technically, you may create these setups with any kind of sunshine: window gentle, pure gentle, speedlights, steady lights, or strobes. However observe that it’s a lot simpler to vary the lighting sample if you happen to can transfer the sunshine supply, so it pays to start with a conveyable studio gentle.
(Although if you happen to can’t transfer the sunshine supply, you may all the time ask your topic to rotate in relation to the sunshine.)
Portrait pictures lighting patterns: remaining phrases
Now that you simply’ve completed this text, you’re properly geared up to create stunning portraits. Merely observe the lighting suggestions I’ve shared, study to shortly type every lighting setup, and also you’ll be good to go!
Now over to you:
Which of those lighting patterns is your favourite? Which model do you intend to make use of in your subsequent photoshoot? Share your ideas within the feedback under!
-
GENERAL
-
PREPARATION
-
SETTINGS
-
LIGHTING
-
POSING
-
COMPOSITION
-
GEAR
-
ADVANCED GUIDES
-
CREATIVE TECHNIQUES
-
POST-PROCESSING
-
BUSINESS
-
INSPIRATION
-
RESOURCES

[ad_2]
Leave a Reply